ArkPass Operating Manual
Event registration, invitations and door check-in
1. Signing in
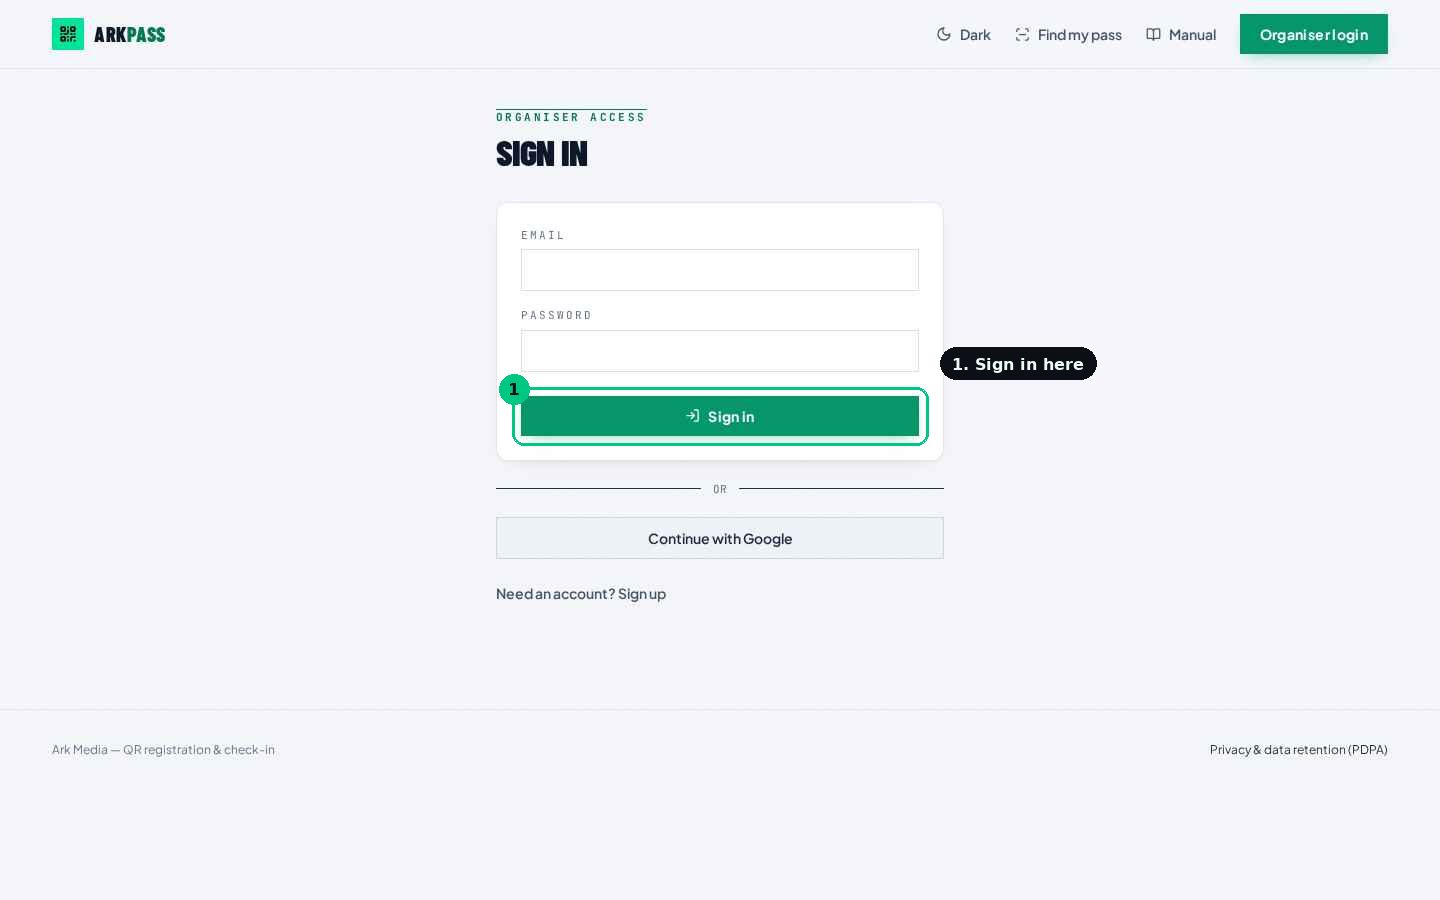
Organisers work from the Command Center; door staff use the Scanner screen.
- 01Open the ArkPass address in a browser and choose Organiser login.
- 02Sign in with the account provided to you.
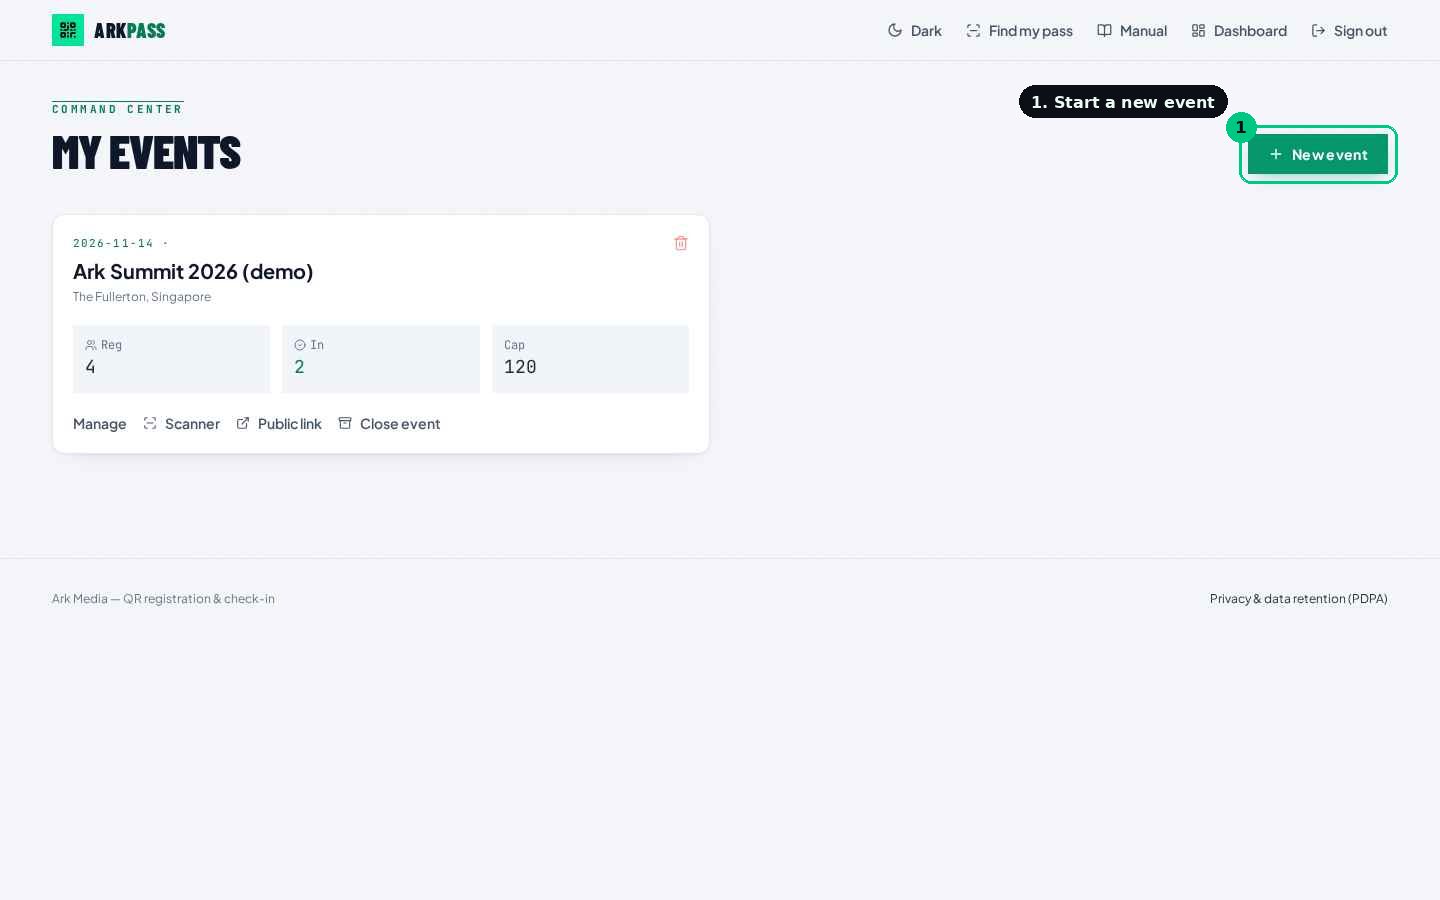
- 03The Dashboard lists your events. Select an event to open its Command Center.
- 04Use Find my pass if a guest needs their own pass link resent to them.
2. Creating an event
Everything a guest sees comes from these details, so fill them in first.
- 01On the Dashboard choose New event.
- 02Enter the name, date, start time, venue and capacity.
- 03Write the description shown on the public registration page.
- 04Upload the event image (key visual) that appears on the registration page.
- 05Set the host organisation and contact email; add a CC address if a colleague should receive a copy of every email.
- 06Choose Draft while you prepare, then Published when registration should open.
- 07Save. The public registration link is shown on the event page and can be copied or shared as a QR code.
3. Event settings that control the guest flow
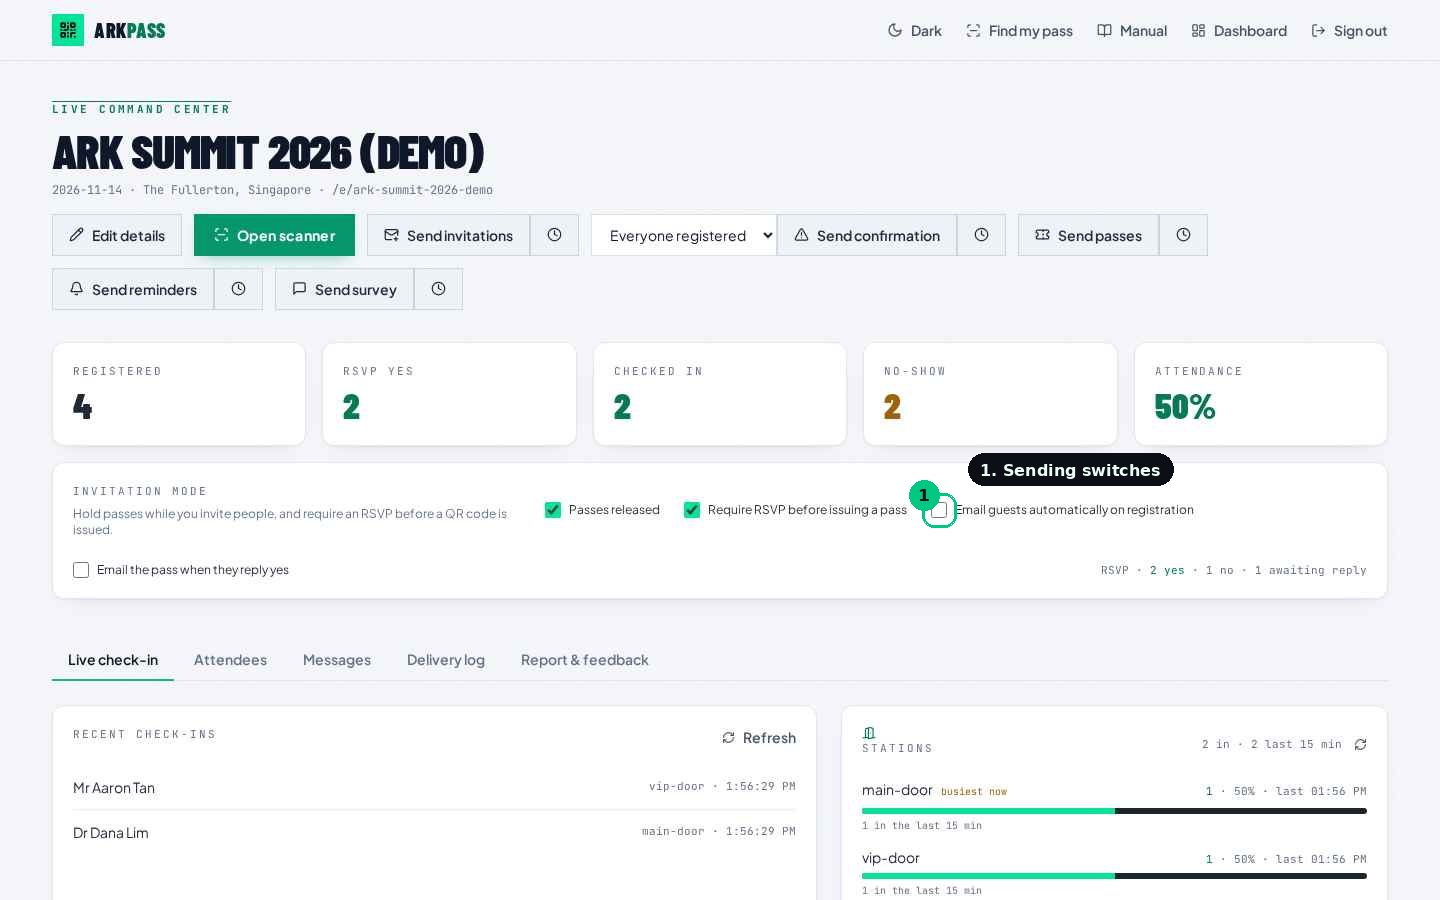
These switches sit on the event page and in Edit details.
- 01RSVP required: guests reply yes or no before a pass is issued.
- 02Passes released: turn on when you are ready for QR passes to be viewable.
- 03Email guests automatically on registration: leave off to keep all sending in your hands; turn on to acknowledge each registration immediately.
- 04Email the pass when they reply yes: off by default; turn on to release a pass the moment a guest accepts.
- 05Waitlist: when capacity is full, extra registrations are held and can be promoted.
4. Writing the emails
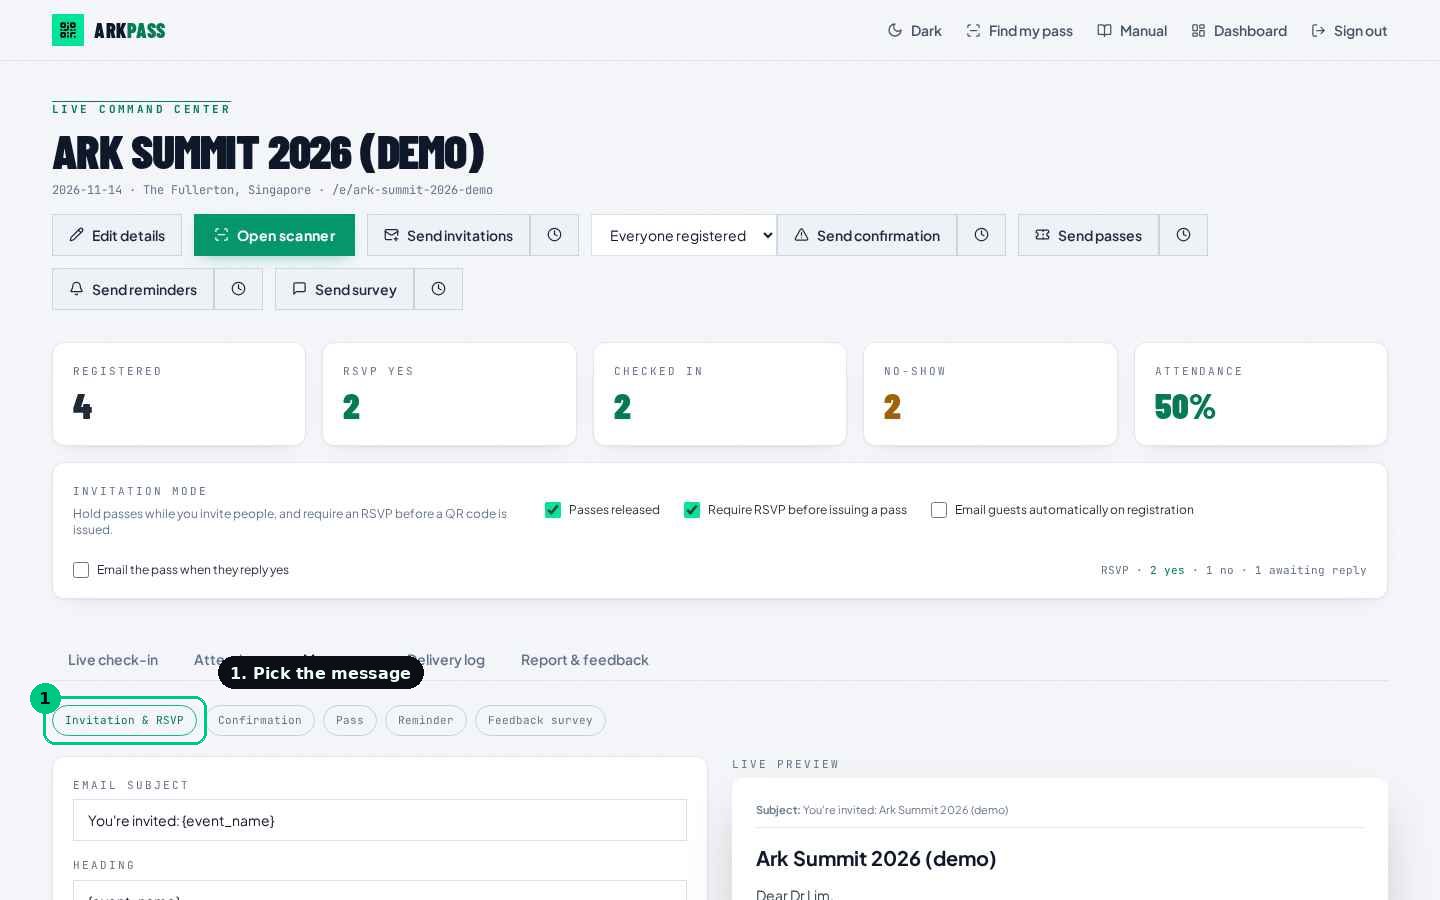
Open the Messages tab. There are five messages, each with its own wording.
- 01Invitation & RSVP: the invite and its reply link.
- 02Confirmation: a general notice you can send to everyone, confirmed guests only, or those who replied yes.
- 03Pass: delivers the QR pass.
- 04Reminder: sent close to the event.
- 05Feedback survey: sent after the event.
- 06For each message set the subject, heading, body and button label. Leave the button label blank to send that email without a button.
- 07Use the formatting tools for bold, italic, underline and links. Press Enter for a new line and twice for a blank line.
- 08Insert placeholders such as {first_name}, {event_name}, {date}, {venue} and {reference}; they are replaced with each guest's own details.
- 09Upload an email banner for the whole event, or override it for one message.
- 10Use the live preview on the right, send yourself a test email, then Save wording.
- 11Restore default returns a single message to the original wording.
5. The RSVP reply page and follow-ups
Found under Messages, Invitation & RSVP.
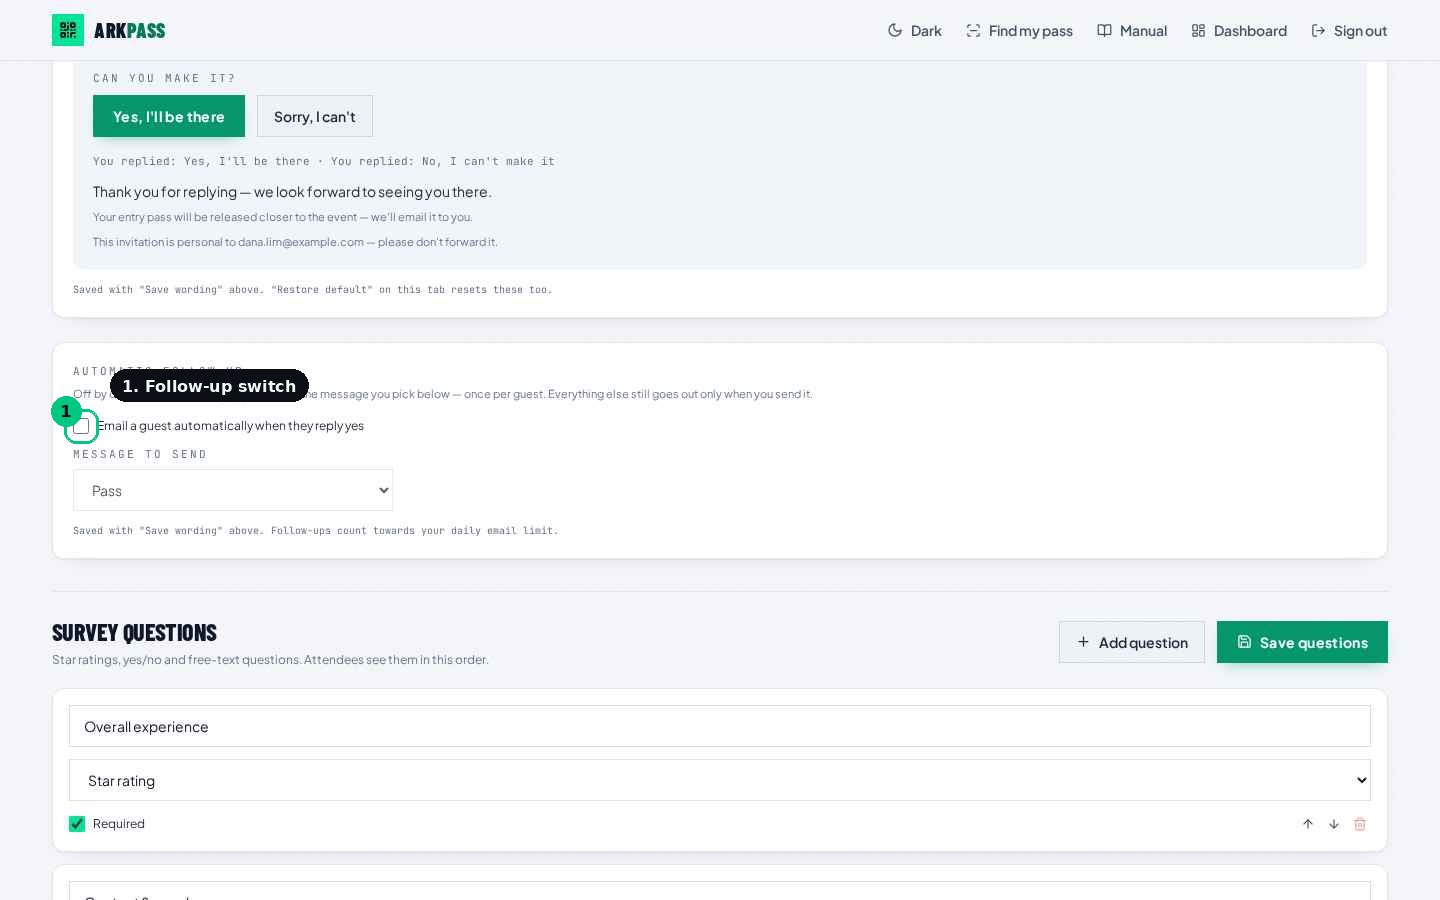
- 01Edit the intro, question, yes and no button labels, and the wording shown after each answer.
- 02Set the thank-you note and the waiting-for-pass note shown after a yes.
- 03Choose whether the QR pass button appears after a yes, and what it is called.
- 04Automatic follow-up: switch it on and pick which message is emailed when a guest replies yes. Each guest receives it once.
- 05Save wording applies these together with the message wording.
6. Sending
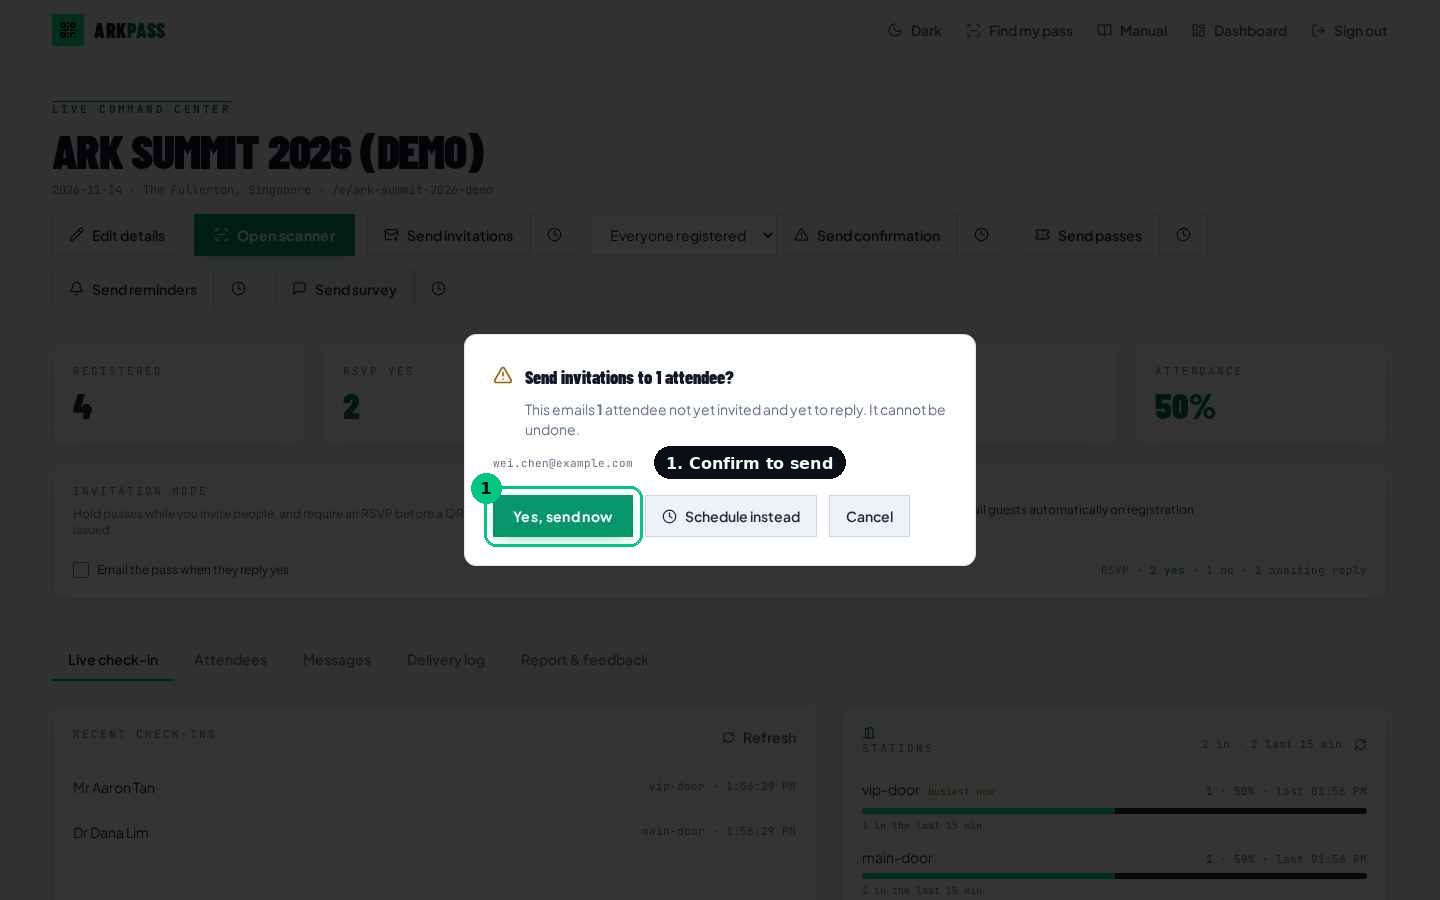
Nothing is emailed until you send it. Every send asks you to confirm first.
- 01Bulk sends sit at the top of the event page: Send invitations, Send confirmation, Send passes, Send reminders, Send survey.
- 02Choose the audience for a confirmation: everyone, confirmed only, or replied yes.
- 03The confirmation window shows how many people will receive it and a few sample addresses. Review, then confirm.
- 04Schedule instead lets you pick a date and time (Singapore time). Scheduled sends appear as a chip and can be cancelled or rescheduled.
- 05To email one person, use the buttons on their row in the Attendees tab: RSVP, Confirm, Pass, Remind, Survey.
- 06Retry failed re-sends only to the addresses that did not go through.
- 07The Delivery log shows, per guest, what was sent on each channel.
7. Managing attendees
The Attendees tab is your working list.
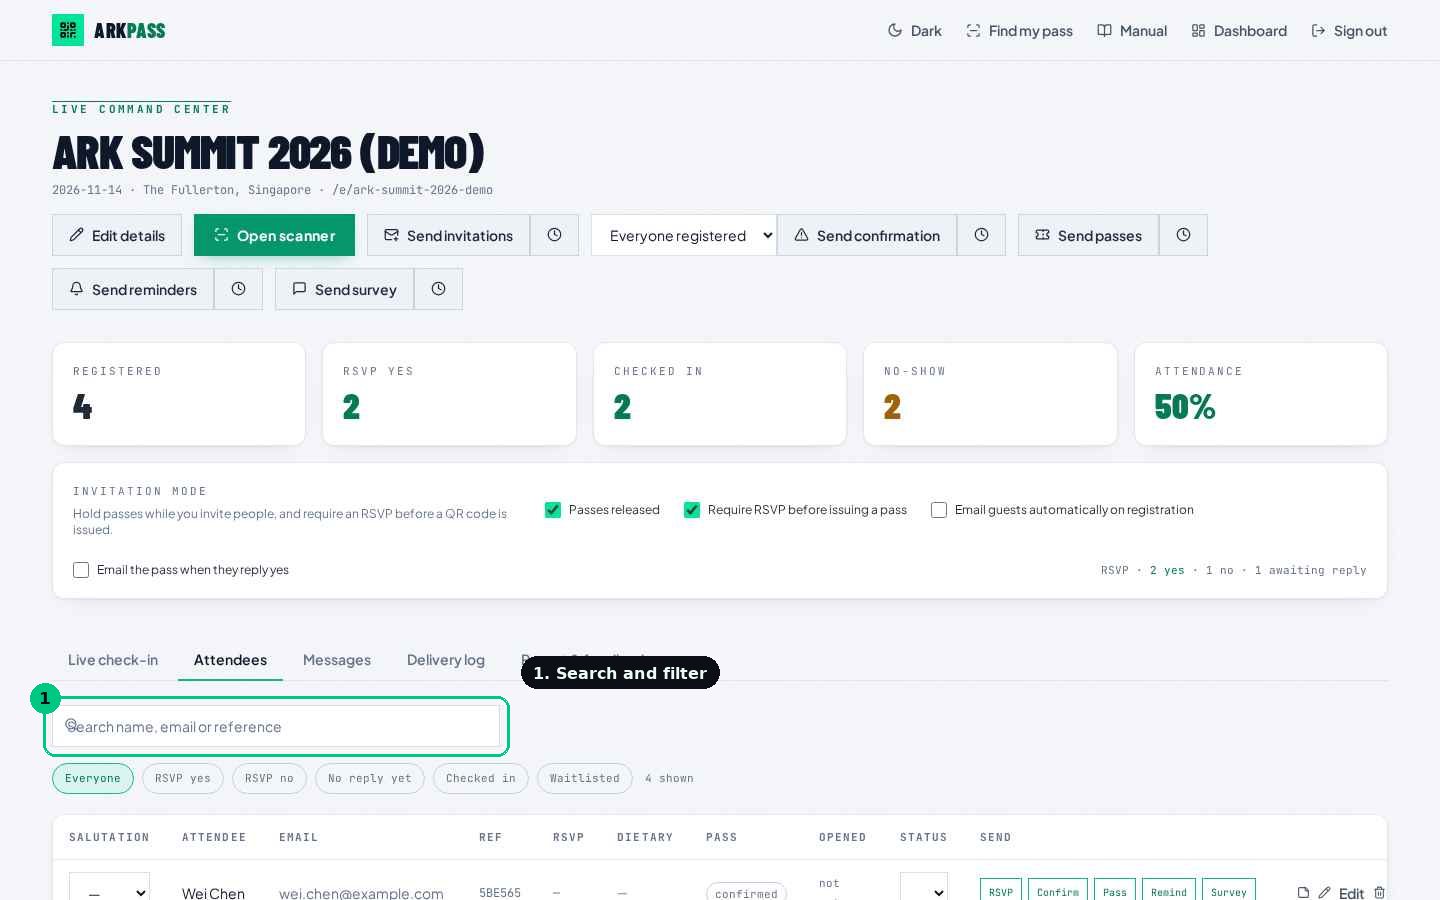
- 01Search by name, email or reference, and use the filter chips to narrow the list.
- 02Status sets a guest's stage. Choosing Confirmed records their RSVP as yes and Declined records it as no, which is useful when someone replies by phone.
- 03Edit corrects a salutation, name, email, phone, company, job title or dietary note. Existing passes stay valid.
- 04The note icon stores a short internal note for your team only.
- 05Delete removes a guest permanently after a named confirmation.
- 06Promote moves a waitlisted guest into a free seat.
- 07Export attendance downloads the full list as a spreadsheet file.
8. At the door
Use the Scanner screen on a laptop, tablet or phone.
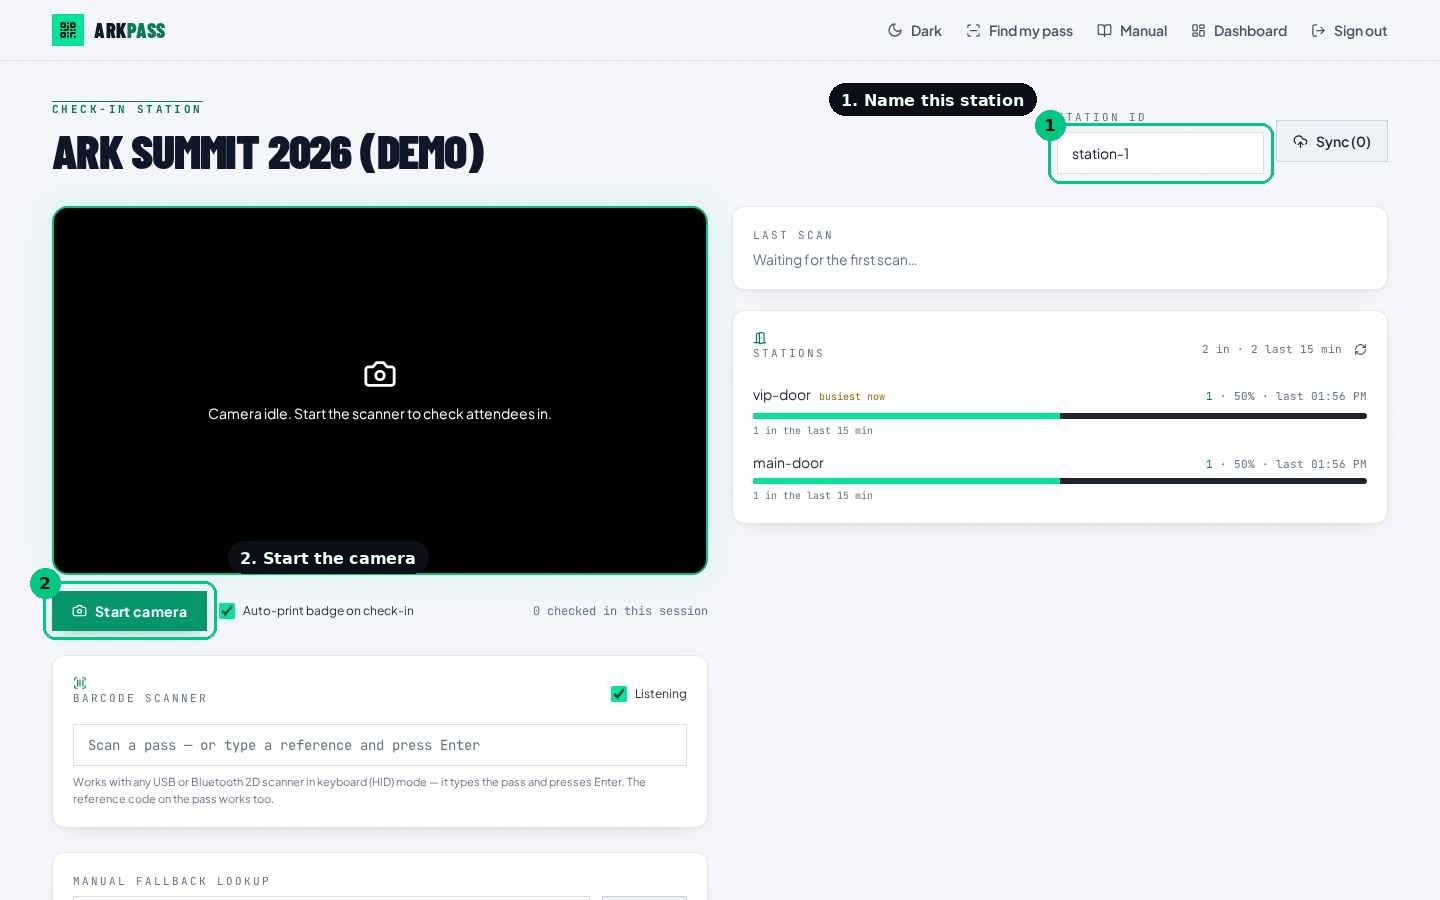
- 01Open the event and choose Check-in scanner, or go to the Scanner screen and pick the event.
- 02Set a Station ID for each device, for example main-door or vip-door.
- 03Start camera and hold the guest's QR code in view. A tick means checked in.
- 04A barcode scanner also works: keep the Barcode scanner card listening, then scan. The guest's reference code can be typed in instead.
- 05Already checked in means the pass has been used; the screen shows the earlier time.
- 06If a pass will not read, search the guest by name or email and check them in manually.
- 07Badge printing can be left on to print as each guest arrives.
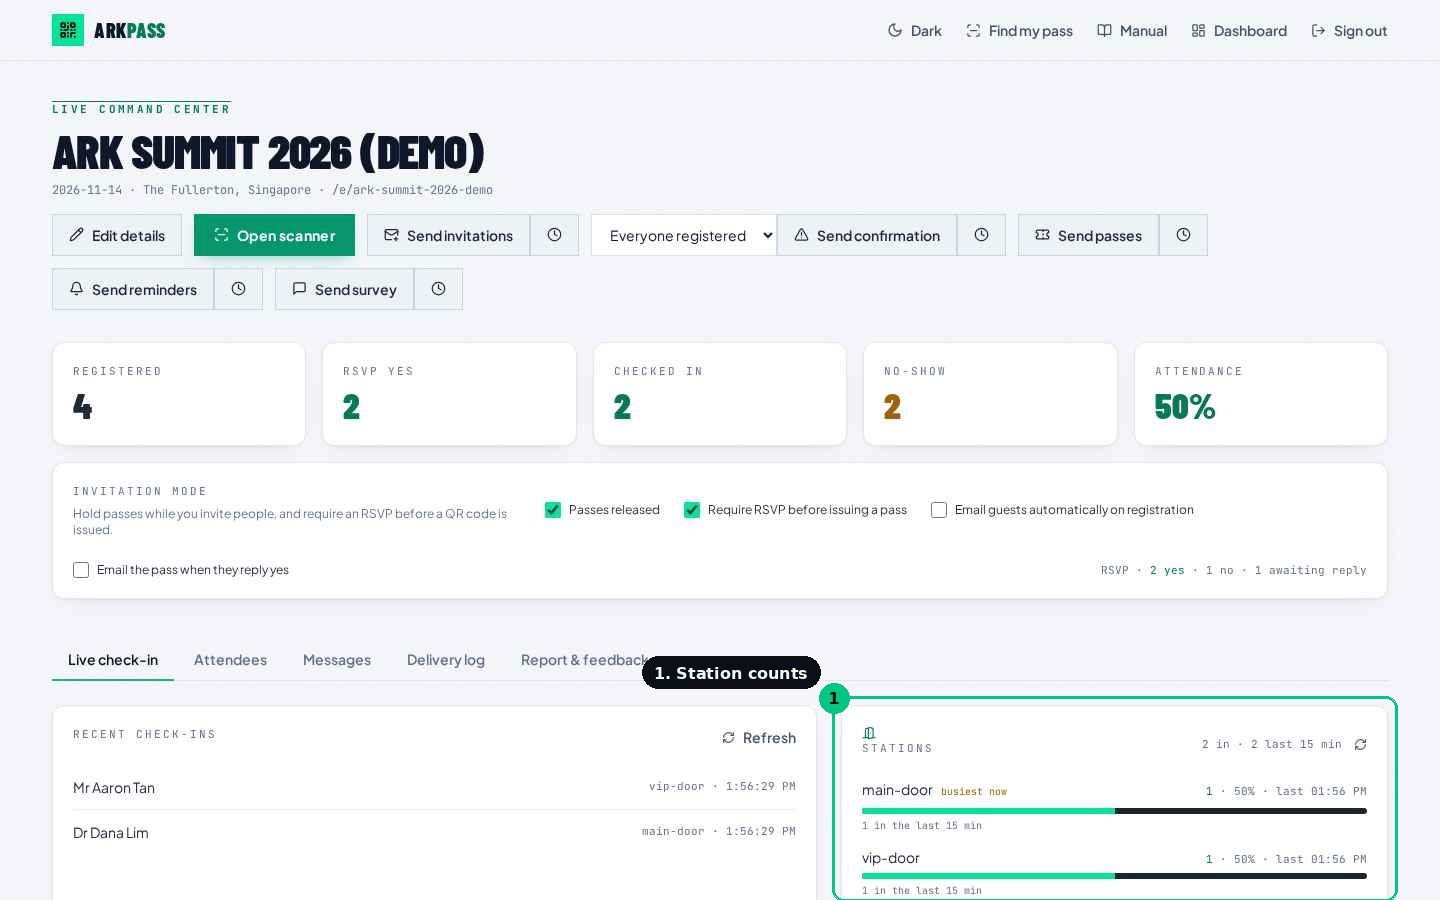
- 08The Stations panel shows how many guests each door has processed.
9. After the event
Reporting and closing off.
- 01The Live check-in tab shows attendance, no-shows and recent arrivals.
- 02Send the feedback survey to everyone who attended.
- 03Survey results appear in the event's reporting area.
- 04Export attendance for your records.
- 05Anonymise personal data removes guests' personal details when the event record is no longer needed.